Content Menu
● Preparation and Safety Measures
● Step-by-Step Motor Removal Process
>> Accessing the Motor
>> Disconnecting Electrical Components
>> Removing Mounting Hardware
>> Detaching the Motor
>> Dealing with Stuck Motors
● Post-Removal Inspection and Cleaning
● Reinstallation Tips
● Troubleshooting Common Issues
● Upgrading Your Golf Cart's Motor
● Maintenance Tips for Longevity
● Conclusion
● FAQ
>> 1. How long does it typically take to remove an electric motor from a Yamaha golf cart?
>> 2. Can I remove the electric motor without removing the entire rear body of the golf cart?
>> 3. What are the signs that indicate I need to remove and inspect my golf cart's electric motor?
>> 4. Is it necessary to replace the motor coupler when removing the electric motor?
>> 5. What precautions should I take when handling the electric motor during removal?
Removing an electric motor from a Yamaha golf cart is a task that requires careful attention to detail and proper tools. This comprehensive guide will walk you through the process step-by-step, ensuring you can safely and effectively remove the electric motor from your Yamaha golf cart. Whether you're performing maintenance, replacing a faulty motor, or upgrading your cart's performance, this article will provide you with the knowledge and confidence to tackle the job.

Preparation and Safety Measures
Before beginning the motor removal process, it's crucial to take proper safety precautions and gather the necessary tools.
Safety First:
- Turn off the power to the golf cart
- Disconnect the battery to ensure safety
- Wear protective gloves and safety glasses
Tools Required:
- Socket set (10mm, 12mm, 13mm)
- Ratcheting wrench
- Wire cutters
- Pliers
- Screwdrivers
- Jack and jack stands
- Electrical tape
- Zip ties
Step-by-Step Motor Removal Process
Accessing the Motor
Begin by removing any panels or covers that may be obstructing access to the motor. In most Yamaha golf carts, the motor is located in the rear of the vehicle.
Video: Locating the motor in a Yamaha golf cart
[Insert video demonstrating the location of the motor]
Disconnecting Electrical Components
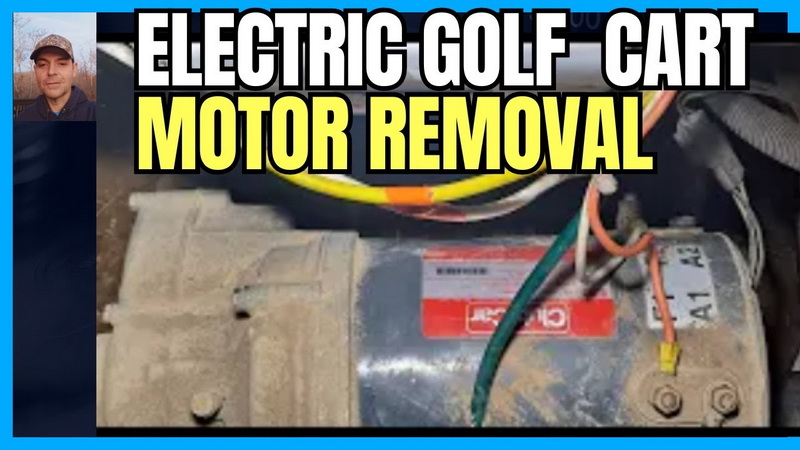
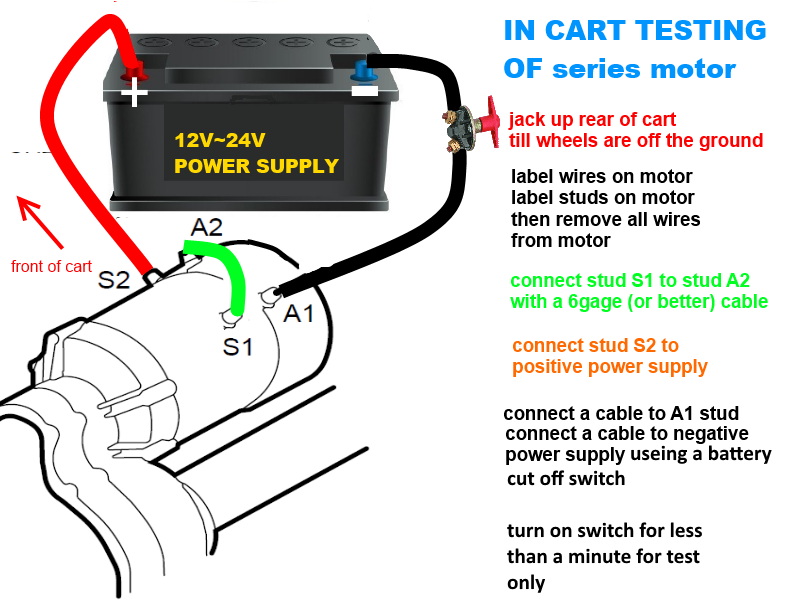
Carefully disconnect all electrical connections to the motor. This typically includes:
- The main power cables
- The speed sensor wire
- Any additional control wires
Label each connection as you remove it to ensure proper reconnection later[3].
Removing Mounting Hardware
Locate and remove the bolts securing the motor to the golf cart's frame or transaxle. For most Yamaha models, this involves:
- Removing three to four bolts holding the motor to the transaxle
- Using a 10mm socket for most of these bolts[1][4]
Pro Tip: Take photos or make diagrams of the bolt locations before removal to aid in reassembly.

Detaching the Motor
Once all bolts are removed, the motor should be ready for extraction. Follow these steps:
1. Support the motor's weight to prevent it from falling
2. Gently twist the motor while applying upward and downward motions
3. Slide the motor off the input shaft of the transaxle[4]
Dealing with Stuck Motors
If the motor is stuck due to rust or other factors:
- Apply a penetrating oil to the junction between the motor and transaxle
- Use a rubber mallet to gently tap around the motor housing
- Be patient and avoid using excessive force to prevent damage
Post-Removal Inspection and Cleaning
After successfully removing the motor, take the opportunity to:
- Inspect the motor for any visible damage or wear
- Clean the motor housing and connections
- Check the condition of the brushes and bearings if accessible
Reinstallation Tips
When it's time to reinstall the motor or replace it with a new one:
- Ensure all mating surfaces are clean and free of debris
- Apply a thin layer of anti-seize compound to the input shaft
- Carefully align the motor with the transaxle before sliding it into place
- Tighten all bolts to the manufacturer's specified torque settings
Troubleshooting Common Issues
During the removal process, you may encounter some challenges. Here are solutions to common problems:
1. Seized bolts: Use penetrating oil and allow it to soak before attempting removal again.
2. Damaged wires: If you notice any frayed or damaged wires, repair or replace them before reinstallation.
3. Misaligned motor: Ensure proper alignment by gently rocking the motor while sliding it onto the input shaft.

Upgrading Your Golf Cart's Motor
If you're removing the motor to upgrade your golf cart's performance, consider the following:
- Ensure the new motor is compatible with your cart's voltage system (36V or 48V)
- Check that the new motor's dimensions match the original for proper fitment
- Consider upgrading the controller if installing a more powerful motor
Maintenance Tips for Longevity
To keep your golf cart's electric motor in top condition:
- Regularly clean the motor and surrounding area
- Check and tighten connections periodically
- Keep the battery properly maintained and charged
- Address any unusual noises or performance issues promptly
Conclusion
Removing an electric motor from a Yamaha golf cart is a manageable task with the right tools and knowledge. By following this guide, you can safely remove the motor for maintenance, replacement, or upgrades. Remember to work methodically, document your steps, and prioritize safety throughout the process. With proper care and maintenance, your golf cart's electric motor will provide reliable performance for years to come.

FAQ
1. How long does it typically take to remove an electric motor from a Yamaha golf cart?
The process usually takes between 1-4 hours, depending on your experience level and the specific model of the golf cart. Beginners should allocate more time to ensure careful execution of each step[3].
2. Can I remove the electric motor without removing the entire rear body of the golf cart?
In most cases, you can remove the motor without extensive disassembly of the golf cart. However, some models may require removal of certain body panels or lifting the rear of the cart for better access[6].
3. What are the signs that indicate I need to remove and inspect my golf cart's electric motor?
Common signs include:
- Unusual noises during operation
- Decreased power or performance
- Intermittent operation or complete failure to start
- Visible damage or excessive wear on external components
4. Is it necessary to replace the motor coupler when removing the electric motor?
It's not always necessary, but it's a good opportunity to inspect the coupler for wear. If you notice any damage or excessive play, it's wise to replace the coupler during reassembly to prevent future issues[8].
5. What precautions should I take when handling the electric motor during removal?
Key precautions include:
- Always disconnect the battery before starting work
- Use proper lifting techniques, as golf cart motors can be heavy
- Avoid dropping the motor, which could damage internal components
- Protect the motor from dirt and moisture during the removal process


