Content Menu
● Preparation and Safety
● Step-by-Step Motor Removal Process
>> Accessing the Motor
>> Disconnecting Electrical Components
>> Removing Mounting Bolts
>> Separating the Motor from the Axle
>> Lifting Out the Motor
● Common Challenges and Solutions
● Post-Removal Inspection
● Reinstallation Tips
● Maintenance to Prevent Future Issues
● Conclusion
● Frequently Asked Questions
>> 1. How often should an electric golf cart motor be serviced?
>> 2. What are signs that an electric golf cart motor needs replacement?
>> 3. Can I replace an electric golf cart motor myself?
>> 4. How long does it typically take to remove an electric golf cart motor?
>> 5. What safety precautions should I take when working on an electric golf cart?
Electric golf carts are popular for their quiet operation and eco-friendly nature. However, like any vehicle, they may require maintenance or repairs over time. One of the most significant components that might need attention is the electric motor. This guide will walk you through the process of removing an electric golf cart motor, providing detailed steps, tips, and important safety considerations.

Preparation and Safety
Before beginning the motor removal process, it's crucial to prioritize safety and proper preparation:
1. Ensure the golf cart is on a level surface and engage the parking brake.
2. Disconnect the battery to prevent any electrical accidents.
3. Gather all necessary tools, including wrenches, socket sets, and a motor puller if required.
4. Wear appropriate safety gear such as gloves and safety glasses.
Step-by-Step Motor Removal Process
Accessing the Motor
Most electric golf cart motors are located at the rear of the vehicle. To access it:
- Remove the seat and any rear body panels.
- Locate the motor, which is typically mounted to the rear axle.
Disconnecting Electrical Components
Carefully disconnect all electrical connections to the motor:
- Remove the main power cables from the motor terminals.
- Disconnect any sensor wires or smaller electrical connections.
- Label each wire to ensure proper reconnection later.
Removing Mounting Bolts
The motor is usually secured with several mounting bolts:
- Identify all mounting bolts connecting the motor to the golf cart frame and axle.
- Use the appropriate size socket or wrench to remove these bolts.
- Keep track of all hardware removed for reassembly.
Separating the Motor from the Axle
This step may vary depending on your golf cart model:
- Some motors slide off the axle splines once the mounting bolts are removed.
- Others may require a motor puller to separate the motor from the axle.
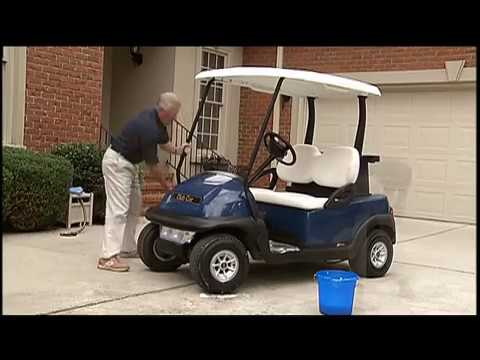
Here's a video demonstrating the process on a common golf cart model:
Lifting Out the Motor
Electric golf cart motors can be heavy, often weighing 40-50 pounds or more:
- Use proper lifting techniques to avoid injury.
- Consider using a jack or lift assist if the motor is particularly heavy.
- Carefully maneuver the motor out of the golf cart, watching for any obstructions.
Common Challenges and Solutions
During the removal process, you may encounter some challenges:
1. Stuck or seized bolts: Apply penetrating oil and allow it to soak before attempting removal.
2. Tight motor-to-axle connection: Use a proper motor puller tool to avoid damage.
3. Limited workspace: Remove additional body panels if necessary to improve access.
Post-Removal Inspection
Once the motor is removed, it's an excellent opportunity to inspect related components:
- Check the axle and bearings for wear.
- Inspect the motor mount for any damage or corrosion.
- Examine electrical connections and wiring for signs of wear or heat damage.

Reinstallation Tips
When it's time to reinstall the motor (either the repaired original or a replacement):
1. Clean all mounting surfaces thoroughly.
2. Apply anti-seize compound to bolts and splines to prevent future seizure.
3. Ensure proper alignment when reconnecting to the axle.
4. Torque all bolts to manufacturer specifications.
5. Double-check all electrical connections before reconnecting the battery.
Maintenance to Prevent Future Issues
Regular maintenance can help prevent the need for motor removal in the future:
- Keep the motor clean and free from debris.
- Regularly inspect and clean electrical connections.
- Follow the manufacturer's recommended service schedule.
Conclusion
Removing an electric golf cart motor can be a challenging but manageable task with the right tools and knowledge. By following these steps and taking necessary precautions, you can successfully remove the motor for repair or replacement. Remember to consult your golf cart's manual for model-specific instructions and always prioritize safety throughout the process.

Frequently Asked Questions
Here are some common questions related to electric golf cart motor removal:
1. How often should an electric golf cart motor be serviced?
Electric golf cart motors typically require service every 12-18 months or 5,000-10,000 miles, whichever comes first. Regular maintenance includes checking brushes, bearings, and electrical connections.
2. What are signs that an electric golf cart motor needs replacement?
Signs include decreased power or range, unusual noises during operation, visible wear or damage to motor components, and frequent electrical system issues.
3. Can I replace an electric golf cart motor myself?
While it's possible for experienced DIY enthusiasts to replace a golf cart motor, it's often recommended to have a professional perform this task due to the complexity of electrical systems and the need for specialized tools.
4. How long does it typically take to remove an electric golf cart motor?
The process usually takes 2-4 hours for an experienced technician. However, it may take longer for those unfamiliar with the process or if complications arise.
5. What safety precautions should I take when working on an electric golf cart?
Always disconnect the battery before working on electrical components, wear appropriate safety gear, use proper lifting techniques, and work in a well-ventilated area. If unsure about any step, consult a professional.


