Content Menu
● Why Install a Radio in Your Golf Cart?
● Choosing the Right Equipment
>> Popular Radio Options
● Understanding Your Golf Cart's Electrical System
● Step-by-Step Installation Guide
>> Disconnect the Battery
>> Determine Power Source
>> Select Mounting Location
>> Install the Radio Head Unit
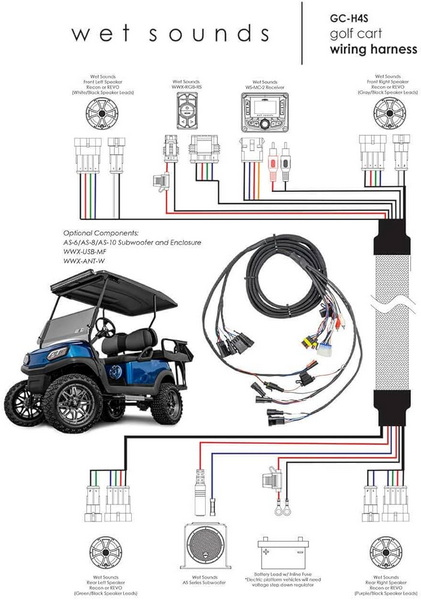
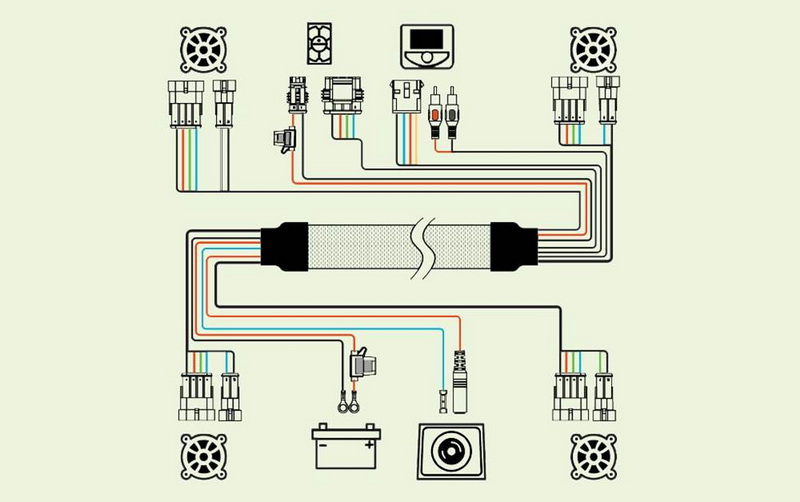
>> Connect Wiring Harness
>> Install Speakers
>>> Speaker Installation Tips
>> Secure All Wiring
>> Reconnect the Battery
>> Test Your System
● Troubleshooting Common Issues
● Enhancing Your Golf Cart Experience
● Additional Considerations
>> Upgrading Your Audio System
● Conclusion
● FAQs
>> 1. What type of radio should I use for my golf cart?
>> 2. Do I need special tools for installation?
>> 3. How do I know if my golf cart requires a voltage reducer?
>> 4. Can I install speakers anywhere in my golf cart?
>> 5. What should I do if my radio doesn't turn on after installation?
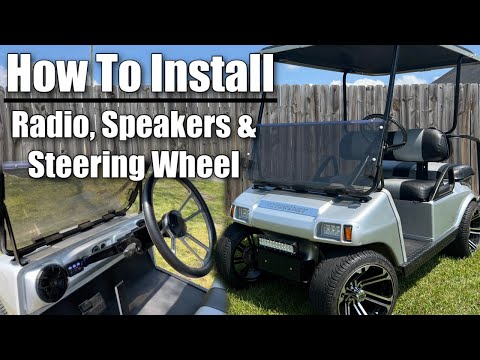
Installing a radio in your electric golf cart can significantly enhance your driving experience, allowing you to enjoy music or radio while cruising around the course. This guide will walk you through the entire process, from selecting the right equipment to final testing.

Why Install a Radio in Your Golf Cart?
Adding a radio to your golf cart not only makes your rides more enjoyable but also provides entertainment during long waits or downtime. Whether you're out on the course or driving around your neighborhood, having music can elevate the experience.
Moreover, many golf carts are used for recreational purposes beyond just golfing, such as community events, family gatherings, and even beach trips. A radio can help set the mood for these occasions, making them more enjoyable for everyone involved.
Choosing the Right Equipment
Before you start the installation, it's essential to gather all necessary materials and tools:
- Radio Head Unit: Choose a model designed for outdoor use, preferably waterproof and durable.
- Speakers: Select speakers that can withstand vibrations and outdoor conditions.
- Wiring Harness: Ensure compatibility with your golf cart's electrical system.
- Mounting Brackets: Needed for securing the radio and speakers.
- Tools: Screwdrivers, wire strippers, crimpers, electrical tape, zip ties, and a multimeter.
Popular Radio Options
When selecting a radio for your golf cart, consider these popular options:
- Boss Audio Systems MGR350B Marine Gauge Receiver: Weatherproof with Bluetooth compatibility.
- Pyle PLMRKT38W Double DIN Stereo System: Offers superior sound quality and robust features at an affordable price.
- Fusion Entertainment MS-RA70 Marine Entertainment System: Premium sound quality with a sleek design.
- Rockville RGHR2 Marine Gauge Hole Receiver: Compact and durable with Bluetooth capabilities.
Understanding Your Golf Cart's Electrical System
Most electric golf carts operate on a 36-volt or 48-volt battery system. To power a standard car radio, which typically requires 12 volts, you'll need to either tap into one of the batteries or use a voltage reducer.
- Batteries: Identify whether your cart has 6-volt or 12-volt batteries. Most golf carts use six 6-volt batteries connected in series to create a 36-volt system or four 12-volt batteries for a 48-volt system.
- Voltage Reducer: If using a 36 or 48-volt system, consider installing a voltage reducer to ensure safe operation of your radio. These devices convert higher voltages down to 12 volts safely.

Step-by-Step Installation Guide
Disconnect the Battery
Safety first! Before starting any electrical work, disconnect the negative terminal of your golf cart's battery to prevent any accidental short circuits or shocks.
Determine Power Source
Most electric golf carts operate on a 12-volt system. Confirm this by checking your cart's specifications. If your cart runs on a higher voltage (like 36 or 48 volts), you will need a voltage reducer to step it down to 12 volts for the radio.
Select Mounting Location
Decide where you want to mount the radio. Common locations include:
- Dashboard
- Overhead console
- Custom mounts
Ensure that the location allows easy access to controls without obstructing your view while driving.
Install the Radio Head Unit
Using a screwdriver, secure the mounting bracket in place according to the manufacturer's instructions. Then attach the radio head unit to this bracket.
Connect Wiring Harness
Connect the wiring harness from the radio to your golf cart's electrical system:
- Positive Wire: Connect to the positive terminal of one battery (for direct connection) or to the output of your voltage reducer.
- Ground Connection: Connect the ground wire from the radio to either the negative terminal of the battery or to a grounding point on the cart's chassis (avoid grounding directly to battery terminals).
Install Speakers
Choose optimal locations for your speakers, ensuring they are securely mounted and positioned for good sound quality. Common spots include:
- Underneath the dashboard
- Side panels
- Overhead areas
Use screws or brackets provided with your speakers for secure installation.
Speaker Installation Tips
When installing speakers:
1. Choose Locations Wisely:
- Common areas include under-dash spaces or rear panels where they won't be obstructed by passengers or equipment.
2. Mounting:
- Use screws provided with speakers; be cautious not to drill too deep into structural components of your cart.
3. Weatherproofing:
- Apply silicone sealant around speaker edges after mounting them; this helps prevent water ingress which could damage internal components over time.
Secure All Wiring
Use zip ties to neatly bundle and secure all wiring. This prevents any loose wires from getting caught or damaged while driving.
Reconnect the Battery
Once everything is installed and secured, reconnect the battery terminals.
Test Your System
Turn on your golf cart and test the radio system:
- Check if it powers on.
- Adjust volume levels.
- Tune into different stations or connect via Bluetooth if available.

Troubleshooting Common Issues
If you encounter problems during installation or operation, consider these common issues:
- Radio Not Turning On: Check all connections and ensure that power is reaching the unit.
- No Sound from Speakers: Verify speaker connections and ensure they are wired correctly.
- Poor Reception: Ensure that your antenna is properly connected and positioned for optimal signal reception.
Enhancing Your Golf Cart Experience
Once you've successfully installed a radio in your electric golf cart, consider adding additional features such as:
1. Subwoofers: For deeper bass sounds that enhance music enjoyment.
2. LED Lighting: Add ambient lighting for nighttime rides.
3. Bluetooth Connectivity: Stream music directly from devices without needing auxiliary cables.
4. Custom Dash Kits: Look into custom dash kits designed specifically for golf carts; these kits often provide better aesthetics and easier integration than generic solutions.
5. Portable Power Sources: Consider adding portable power banks that can charge devices while you enjoy music on-the-go.
6. Sound Dampening Materials: Install sound dampening materials within your golf cart to reduce road noise and improve audio clarity.
Additional Considerations
Upgrading Your Audio System
If you're looking for an enhanced audio experience beyond basic installation:
1. Consider Adding an Amplifier:
- An amplifier can drive more power into speakers resulting in clearer sound at higher volumes without distortion.
2. Subwoofer Integration:
- Adding subwoofers can enrich low-frequency sounds significantly enhancing overall audio quality especially when playing bass-heavy music genres.
3. Professional Installation Options:
- If you're unsure about any step in this process, hiring professionals might save time and ensure optimal performance of your audio system.
4. Regular Maintenance Checks:
- Periodically check connections and components for wear and tear due to exposure to outdoor elements; this ensures longevity of your audio equipment.
Conclusion
Installing a radio in an electric golf cart is a straightforward process that can greatly enhance your enjoyment while driving. By following these steps carefully, you can successfully add this feature to your cart and enjoy music during your rides while also personalizing it according to your preferences—making every ride more enjoyable whether you're hitting up local courses or enjoying leisurely drives around town.

FAQs
1. What type of radio should I use for my golf cart?
Choose a radio specifically designed for outdoor use, ideally waterproof and able to withstand vibrations.
2. Do I need special tools for installation?
Basic tools like screwdrivers, wire strippers, crimpers, and zip ties are typically sufficient for installation.
3. How do I know if my golf cart requires a voltage reducer?
Check your golf cart's specifications; if it operates on 36 or 48 volts, you'll need a voltage reducer to safely power a 12-volt radio.
4. Can I install speakers anywhere in my golf cart?
While you can install speakers in various locations, ensure they are mounted securely and positioned for optimal sound quality.
5. What should I do if my radio doesn't turn on after installation?
Double-check all wiring connections and ensure power is reaching the unit; also verify that fuses are intact.


