Content Menu
● Understanding Your Golf Cart's Power System
● Choosing the Right Christmas Lights
● Materials Needed
● Step-by-Step Installation Guide
>> Step 1: Prepare Your Golf Cart
>> Step 2: Arrange Your Christmas Lights
>> Step 3: Connecting Power
>> Step 4: Testing Your Setup
● Safety Tips
● Enhancing Your Setup
● Maintenance Tips After Installation
● Conclusion
● FAQ
>> 1. Can I use regular Christmas lights on my golf cart?
>> 2. How do I secure the lights without damaging my golf cart?
>> 3. What type of inverter do I need?
>> 4. Are there battery-powered options?
>> 5. How can I ensure my light setup is waterproof?
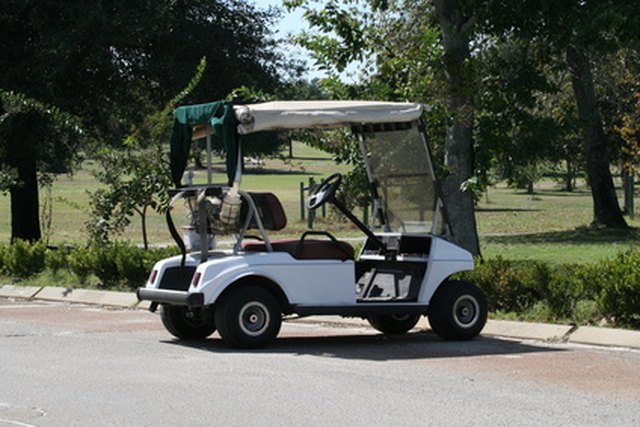
Decorating your electric golf cart with Christmas lights can add a festive touch to your holiday celebrations. Whether you're participating in a parade, hosting a holiday party, or simply spreading cheer around your neighborhood, this guide will walk you through the steps to safely and effectively connect Christmas lights to your electric golf cart.

Understanding Your Golf Cart's Power System
Before diving into the installation process, it's essential to understand the power system of your golf cart. Most electric golf carts operate on either 36V or 48V systems, depending on the model. Here's how to identify and prepare your golf cart for the installation:
- Identify Voltage: Check the voltage of your golf cart (usually labeled on the battery). This is crucial for selecting compatible Christmas lights.
- Power Source Options: Determine whether your cart has a 12V accessory outlet or if you need an inverter to convert the voltage. Understanding this will help you choose the right lights and avoid any electrical mishaps.
Choosing the Right Christmas Lights
When selecting Christmas lights for your golf cart, consider the following options:
- LED Lights: Opt for LED lights as they consume less power and are more durable than traditional incandescent bulbs. They are also available in various colors and styles.
- Battery-Powered Lights: If you want a simpler setup without wiring complications, consider using battery-powered LED lights. These can be easily attached and removed without any permanent modifications to your cart.
- 12V Lights: If your cart has a 12V outlet, you can directly use 12V Christmas lights designed for automotive use. These lights are specifically made to work with low-voltage systems, making them ideal for golf carts.
Materials Needed
To connect Christmas lights to your electric golf cart, gather the following materials:
- LED Christmas lights (preferably 12V)
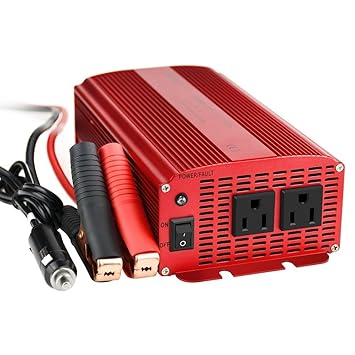
- DC to AC inverter (if using standard AC lights)
- Zip ties or adhesive clips for securing lights
- Electrical tape for waterproofing connections
- Optional: Command hooks for easy removal
- Extension cords (if necessary)
- A multimeter for testing voltage and connections
Step-by-Step Installation Guide
Step 1: Prepare Your Golf Cart
1. Park Safely: Drive your golf cart into a garage or sheltered area. Ensure it's turned off and secured with the parking brake.
2. Dry Off: Wipe down any wet surfaces to prevent electrical issues during installation.
3. Inspect Your Cart: Check for any existing electrical issues or damage that could affect your setup. Ensure that all connections are clean and secure.

Step 2: Arrange Your Christmas Lights
1. Wrap Lights: Begin wrapping the Christmas lights around the frame of the golf cart. Use one wrap every six inches for stability.
2. Secure with Zip Ties: As you wrap, use zip ties or adhesive clips to secure the light strands in place. Avoid wrapping near tires or moving parts.
3. Connect Strands: If you need additional length, plug multiple strands together according to the manufacturer's instructions.
4. Creative Placement: Consider placing lights around key areas such as the roof, front grille, and rear bumper for maximum visibility. You can also drape them over seats or attach them to side mirrors for added flair.
Step 3: Connecting Power
1. Using a 12V Outlet:
- Plug the LED light's connector directly into the 12V accessory outlet if available.
- Ensure that the outlet is functioning properly by testing it with another device first.
2. Using an Inverter:
- If using standard AC lights, connect a DC to AC inverter into the cigarette lighter socket.
- Plug your Christmas lights into the inverter's outlet.
- Make sure that the inverter is rated for continuous use and can handle the wattage of your light setup.
3. Check Connections: Ensure all connections are secure and use electrical tape to waterproof any exposed wiring.
4. Testing Voltage: Use a multimeter to check that voltage levels are correct at each connection point before powering on your lights.
Step 4: Testing Your Setup
1. Power On: Turn on your golf cart and check if all light strands illuminate properly.
2. Troubleshoot: If some lights do not work, check connections and replace any faulty strands.
3. Check for Flickering: If any lights flicker or fail to stay lit, inspect all connections again and look for potential short circuits in wiring.

Safety Tips
- Always ensure that all electrical connections are insulated to prevent short circuits.
- Avoid overloading your golf cart's power system by checking wattage ratings of all connected devices.
- Use waterproof lighting solutions if you plan to drive in wet conditions.
- Keep an eye on battery levels while using decorative lighting; extended use may drain your golf cart's battery faster than usual.
Enhancing Your Setup
To make your golf cart stand out even more:
- Consider adding decorative elements like garlands or themed decorations alongside your lights.
- Pair your setup with portable Bluetooth speakers for festive music while you ride around. This creates an immersive experience that enhances holiday spirit.
- Use reflective tape or stickers in combination with your lighting setup; this can help increase visibility during nighttime rides while adding an extra layer of decoration.
Maintenance Tips After Installation
After enjoying your decorated golf cart throughout the holiday season, it's important to maintain both your lighting setup and golf cart:
- Remove Lights Carefully: When taking down decorations, do so gently to avoid damaging any wires or connections.
- Store Properly: Store Christmas lights in a cool, dry place to prevent damage from moisture or pests during off-seasons.
- Inspect Regularly: Before each use, inspect both your golf cart and lighting setup for any signs of wear or damage that could pose safety risks.
Conclusion
Connecting Christmas lights to an electric golf cart is a fun way to celebrate the holiday season while showcasing creativity. By following these steps and ensuring safety precautions, you can create a festive atmosphere that brings joy to yourself and those around you. The process not only enhances your holiday spirit but also allows you to engage with friends and family in a unique way during festivities.

FAQ
1. Can I use regular Christmas lights on my golf cart?
Yes, but ensure they are rated for 12V or use a DC to AC inverter if they require higher voltage.
2. How do I secure the lights without damaging my golf cart?
Use zip ties or adhesive clips designed for automotive applications; avoid using nails or screws that could damage surfaces.
3. What type of inverter do I need?
Choose an inverter that matches your golf cart's voltage system (e.g., a 48V to 110V inverter) if using standard AC lights.
4. Are there battery-powered options?
Yes, many battery-powered LED Christmas lights are available that do not require wiring and can be easily attached using hooks or clips.
5. How can I ensure my light setup is waterproof?
Use waterproof LED lights and cover any exposed connections with weatherproof electrical tape to prevent water damage.


