Content Menu
● Why Clean Your Golf Cart Battery Compartment?
● Essential Tools and Materials
● Step-by-Step Guide to Washing Your Golf Cart Battery Compartment
>> Prepare for Cleaning
>> Disconnect the Batteries
>> Prepare the Cleaning Solution
>> Clean the Battery Compartment
>> Rinse and Dry
>> Clean Battery Tops
>> Inspect and Protect
>> Reconnect the Batteries
>> Final Check and Close Up
● Additional Tips for Battery Maintenance
● Video Tutorial: Cleaning Golf Cart Batteries
● Conclusion
● Frequently Asked Questions
>> 1. How often should I clean my golf cart battery compartment?
>> 2. Can I use regular tap water to clean my golf cart batteries?
>> 3. Is it safe to use a pressure washer to clean my golf cart battery compartment?
>> 4. What should I do if I notice severe corrosion on my battery terminals?
>> 5. Can I clean my golf cart battery compartment while the batteries are charging?
Maintaining your electric golf cart's battery compartment is crucial for ensuring optimal performance and longevity of your vehicle. A clean battery compartment not only improves the overall appearance of your golf cart but also helps prevent corrosion and electrical issues. In this comprehensive guide, we'll walk you through the step-by-step process of washing an electric golf cart battery compartment, provide essential tips, and address common concerns.

Why Clean Your Golf Cart Battery Compartment?
Before diving into the cleaning process, it's important to understand why regular maintenance of your golf cart's battery compartment is necessary:
1. Prevents corrosion: Regular cleaning helps remove corrosive buildup on battery terminals and connections, which can impede electrical flow and reduce battery performance[1].
2. Extends battery life: A clean battery compartment ensures proper ventilation and reduces the risk of short circuits, ultimately prolonging the life of your batteries[3].
3. Improves safety: Removing dirt, debris, and corrosive materials reduces the risk of electrical hazards and potential battery failures[1].
4. Enhances performance: Clean batteries and connections promote efficient power transfer, resulting in better overall golf cart performance[3].
Essential Tools and Materials
Before you begin the cleaning process, gather the following items:
- Safety goggles
- Rubber gloves
- Old clothes or coveralls
- Baking soda
- Warm water
- Bucket
- Soft-bristled brush or old toothbrush
- Clean cloths or rags
- Spray bottle
- Wrench set
- Battery terminal cleaner (optional)
- Battery terminal protector spray
Step-by-Step Guide to Washing Your Golf Cart Battery Compartment
Prepare for Cleaning
Safety should be your top priority when working with golf cart batteries. Follow these preparatory steps:
1. Park your golf cart in a well-ventilated area, preferably outdoors.
2. Turn off the golf cart and remove the key.
3. Put on your safety goggles and rubber gloves.
4. Open the battery compartment and remove any loose debris[1].

Disconnect the Batteries
To ensure safety during the cleaning process, disconnect the batteries:
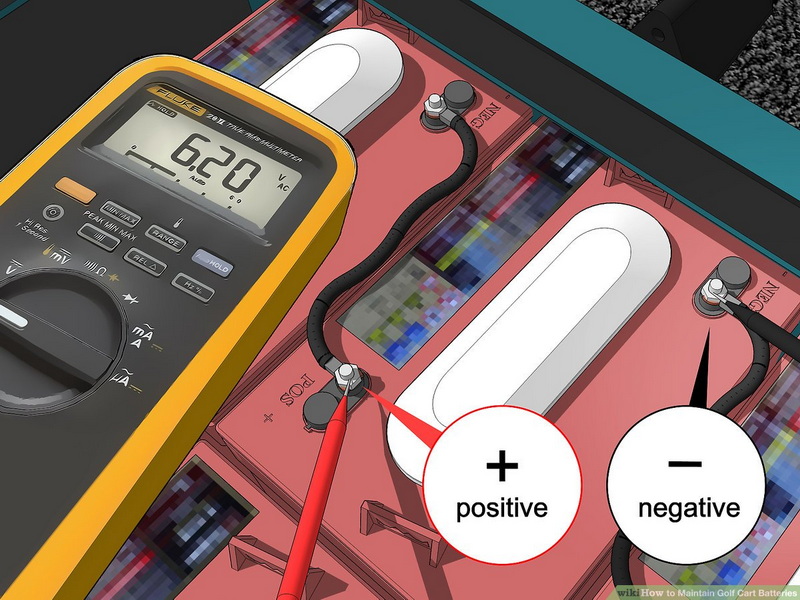
1. Identify the negative (-) terminal, usually marked with a black cap or wire.
2. Use a wrench to loosen and remove the negative cable first.
3. Repeat the process for the positive (+) terminal, marked with a red cap or wire[1].
Prepare the Cleaning Solution
Create a safe and effective cleaning solution:
1. In a bucket, mix 1 cup of baking soda with 1 gallon of warm water.
2. Stir until the baking soda is fully dissolved[2].
Clean the Battery Compartment
Now it's time to clean the battery compartment:
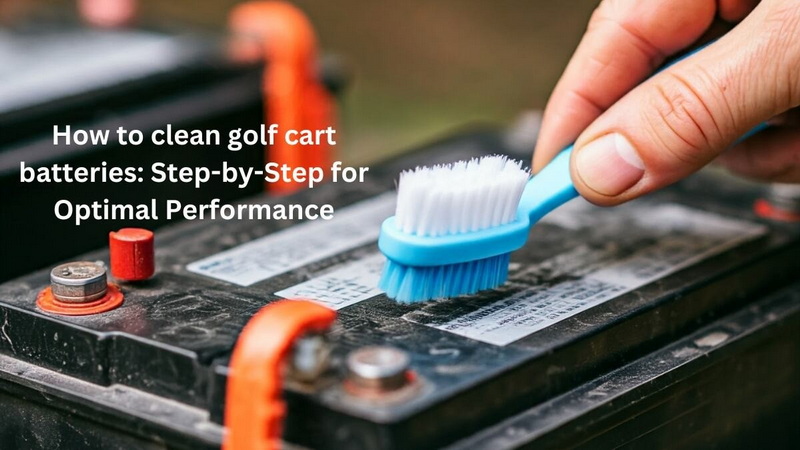
1. Dip a soft-bristled brush or old toothbrush into the baking soda solution.
2. Gently scrub the battery terminals, connections, and surrounding areas.
3. Pay extra attention to areas with visible corrosion or buildup[1][2].
Rinse and Dry
After scrubbing, it's important to rinse and dry the compartment thoroughly:
1. Use a spray bottle filled with clean water to rinse the cleaned areas.
2. Avoid using a hose, as excessive water can damage electrical components.
3. Wipe down all surfaces with clean, dry cloths[1].
Clean Battery Tops
Don't forget to clean the tops of the batteries:
1. Dip a cloth in the baking soda solution and wring it out.
2. Gently wipe the tops of the batteries to remove any dirt or residue.
3. Be careful not to let any liquid enter the battery cells[3].

Inspect and Protect
Before reassembling, inspect and protect the components:
1. Check for any signs of damage or wear on cables and connections.
2. Apply a thin layer of battery terminal protector spray to the terminals and connections to prevent future corrosion[3].
Reconnect the Batteries
Once everything is clean and dry, reconnect the batteries:
1. Start with the positive (+) terminal, securing it tightly.
2. Connect the negative (-) terminal last.
3. Ensure all connections are secure but not over-tightened[1].
Final Check and Close Up
Before finishing up:
1. Double-check all connections and ensure no tools are left in the compartment.
2. Close the battery compartment securely.
3. Test the golf cart to ensure everything is functioning correctly[1].
Additional Tips for Battery Maintenance
To keep your golf cart batteries in top condition:
1. Regular inspections: Check your battery compartment monthly for signs of corrosion or damage.
2. Water levels: If you have flooded lead-acid batteries, check and maintain proper water levels using distilled water[3].
3. Charging habits: Always follow the manufacturer's recommendations for charging your golf cart batteries[3].
4. Storage: If storing your golf cart for extended periods, consider using a battery maintainer to keep the batteries charged[3].
Video Tutorial: Cleaning Golf Cart Batteries
For a visual guide on cleaning golf cart batteries, watch this helpful video:
Conclusion
Regularly washing your electric golf cart's battery compartment is an essential part of maintenance that can significantly extend the life of your batteries and improve the overall performance of your golf cart. By following this comprehensive guide and incorporating these cleaning practices into your routine, you'll ensure that your golf cart remains in top condition for years to come.
Remember, safety should always be your primary concern when working with golf cart batteries. If you're unsure about any aspect of the cleaning process, don't hesitate to consult a professional or refer to your golf cart's manual for specific guidance.

Frequently Asked Questions
1. How often should I clean my golf cart battery compartment?
It's recommended to clean your golf cart battery compartment at least every 3-4 months, or more frequently if you use your cart regularly or in dusty environments. Regular inspections can help you determine if more frequent cleaning is necessary[3].
2. Can I use regular tap water to clean my golf cart batteries?
While tap water can be used for cleaning the exterior of the batteries, it's best to use distilled water for any solution that might come into contact with the battery cells. This is because tap water may contain minerals that can affect battery performance over time[3].
3. Is it safe to use a pressure washer to clean my golf cart battery compartment?
No, it's not recommended to use a pressure washer on your golf cart battery compartment. The high-pressure water can force its way into sensitive electrical components and cause damage. Stick to gentle cleaning methods using a soft brush and cloth[1].
4. What should I do if I notice severe corrosion on my battery terminals?
If you notice severe corrosion, you may need to use a specialized battery terminal cleaner. After cleaning, consider replacing severely corroded terminals or cables. If the problem persists, consult a professional as it may indicate a more serious issue with your batteries[2].
5. Can I clean my golf cart battery compartment while the batteries are charging?
No, never attempt to clean your golf cart battery compartment while the batteries are charging. Always disconnect the charger and ensure the golf cart is powered off before beginning any cleaning or maintenance procedures.


