Content Menu
● Understanding the Basics of Electric Golf Cart Motors
● Tools Required for Testing an Electric Golf Cart Motor
● Safety Precautions
● Step-by-Step Guide to Testing an Electric Golf Cart Motor
>> Visual Inspection
>> Resistance Testing
>> Voltage Testing
>> Amperage Testing
>> Free Spin Test
>> Load Testing
>> Brush Inspection
>> Commutator Inspection
>> Bearing Check
>> Insulation Testing
● Advanced Testing Techniques
>> Oscilloscope Testing
>> Thermal Imaging
>> Vibration Analysis
● Interpreting Test Results
● Common Electric Golf Cart Motor Problems
● Maintenance Tips for Electric Golf Cart Motors
● When to Seek Professional Help
● Conclusion
● Related Questions and Answers
>> 1. How often should I test my electric golf cart motor?
>> 2. Can I test the motor without removing it from the golf cart?
>> 3. What are the signs that my electric golf cart motor needs testing?
>> 4. How long does an electric golf cart motor typically last?
>> 5. Can I replace the brushes in my electric golf cart motor myself?
Electric golf carts have become increasingly popular for their eco-friendly nature and ease of use. At the heart of these vehicles lies the electric motor, a crucial component that requires regular maintenance and occasional testing to ensure optimal performance. This comprehensive guide will walk you through the process of testing an electric golf cart motor, providing valuable insights and practical tips for both novice and experienced golf cart owners.

Understanding the Basics of Electric Golf Cart Motors
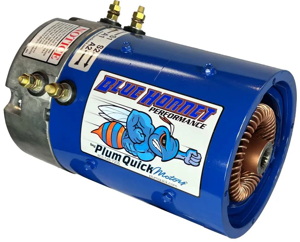
Before diving into the testing procedures, it's essential to understand the basic components and workings of an electric golf cart motor. These motors are typically DC (Direct Current) motors, designed to convert electrical energy into mechanical energy to propel the cart.
The main components of an electric golf cart motor include:
1. Armature
2. Field windings
3. Commutator
4. Brushes
5. Bearings
Each of these components plays a vital role in the motor's operation, and issues with any of them can lead to performance problems or complete motor failure.
Tools Required for Testing an Electric Golf Cart Motor
To effectively test an electric golf cart motor, you'll need the following tools:
1. Multimeter
2. Screwdriver set
3. Socket wrench set
4. Insulated gloves
5. Safety glasses
6. Bench vise (for bench testing)
7. Battery load tester
Ensure that all tools are in good condition and properly calibrated before beginning the testing process.

Safety Precautions
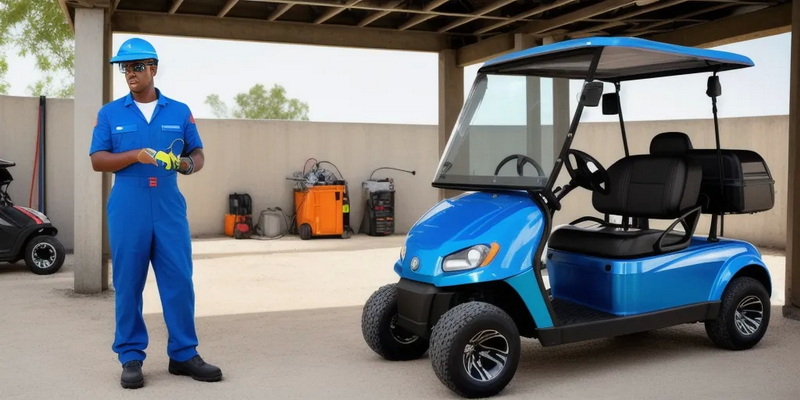
Safety should always be your top priority when working with electrical components. Follow these safety guidelines:
1. Disconnect the battery before working on the motor
2. Wear insulated gloves and safety glasses
3. Work in a well-ventilated area
4. Keep a fire extinguisher nearby
5. Never work alone – have someone nearby in case of emergencies
Step-by-Step Guide to Testing an Electric Golf Cart Motor
Visual Inspection
Begin with a thorough visual inspection of the motor and its surrounding components:
1. Check for any visible damage or signs of wear
2. Look for loose connections or frayed wires
3. Inspect the brushes for excessive wear
4. Examine the commutator for scoring or damage
Resistance Testing
Use a multimeter to measure the resistance between the motor terminals:
1. Set the multimeter to the ohms setting
2. Touch the probes to the motor terminals
3. Record the resistance reading
A typical reading should be between 0.1 and 0.5 ohms. Higher readings may indicate internal damage or worn brushes.
Voltage Testing
Test the voltage supply to the motor:
1. Set the multimeter to DC voltage
2. Connect the probes to the motor terminals
3. Have an assistant press the accelerator pedal
4. Record the voltage reading
The voltage should increase smoothly as the pedal is pressed. Erratic readings may indicate controller issues.
Amperage Testing
Measure the current draw of the motor:
1. Set the multimeter to DC amperage
2. Connect the probes in series with the motor
3. Have an assistant press the accelerator pedal
4. Record the amperage reading
Excessive current draw may indicate internal motor problems or issues with the controller.
Free Spin Test
Perform a free spin test to check for mechanical issues:
1. Jack up the drive wheels
2. Disconnect the motor from the controller
3. Apply 12V directly to the motor terminals
4. Observe the motor's rotation
The motor should spin smoothly and quietly. Any unusual noises or vibrations may indicate bearing problems or internal damage.
Load Testing
Conduct a load test to assess the motor's performance under stress:
1. Use a bench vise to secure the motor
2. Connect a battery load tester to the motor
3. Apply a load and observe the motor's performance
4. Record voltage and amperage readings under load
This test can help identify issues that may not be apparent during no-load testing.
Brush Inspection
Inspect the motor brushes for wear:
1. Remove the brush cover
2. Carefully extract the brushes
3. Measure the length of each brush
4. Check for even wear and proper seating
Replace brushes that are worn beyond the manufacturer's specifications.
Commutator Inspection
Examine the commutator for signs of wear or damage:
1. Remove the motor end cap
2. Inspect the commutator surface for scoring or pitting
3. Check for any loose or damaged segments
4. Clean the commutator with fine sandpaper if necessary
A damaged commutator may require professional repair or motor replacement.
Bearing Check
Test the motor bearings for smooth operation:
1. Rotate the motor shaft by hand
2. Listen for any grinding or roughness
3. Check for excessive play in the shaft
Worn bearings can cause increased friction and reduced motor efficiency.
Insulation Testing
Perform an insulation resistance test:
1. Set the multimeter to the highest resistance range
2. Connect one probe to a motor terminal
3. Touch the other probe to the motor casing
4. The reading should be infinite or very high
A low reading indicates a short circuit between the windings and the motor casing.

Advanced Testing Techniques
For more in-depth analysis, consider the following advanced testing methods:
Oscilloscope Testing
An oscilloscope can provide detailed information about the motor's electrical characteristics:
1. Connect the oscilloscope to the motor terminals
2. Observe the waveform during operation
3. Look for any irregularities in the signal
Thermal Imaging
Use a thermal camera to detect hot spots or uneven heating in the motor:
1. Run the motor under load for several minutes
2. Scan the motor with a thermal camera
3. Look for any areas of excessive heat
Abnormal heat patterns can indicate internal problems or poor cooling.
Vibration Analysis
Employ vibration analysis tools to detect mechanical issues:
1. Attach vibration sensors to the motor housing
2. Run the motor at various speeds
3. Analyze the vibration data for abnormalities
Excessive vibration can signal bearing problems, misalignment, or other mechanical issues.
Interpreting Test Results
Accurate interpretation of test results is crucial for diagnosing motor problems:
1. Compare your readings to manufacturer specifications
2. Look for patterns in the data across different tests
3. Consider the motor's age and usage history
4. Consult with a professional if you're unsure about the results
Remember that some issues may require specialized equipment or expertise to diagnose accurately.
Common Electric Golf Cart Motor Problems
Be aware of these common issues that can affect electric golf cart motors:
1. Worn brushes
2. Damaged commutator
3. Bearing failure
4. Overheating
5. Controller malfunction
6. Wiring issues
7. Moisture damage
Identifying these problems early can prevent more serious damage and extend the life of your golf cart motor.

Maintenance Tips for Electric Golf Cart Motors
Regular maintenance can help prevent many common motor problems:
1. Keep the motor clean and dry
2. Inspect brushes and replace as needed
3. Lubricate bearings according to manufacturer recommendations
4. Check and tighten all electrical connections
5. Protect the motor from extreme temperatures and moisture
When to Seek Professional Help
While many tests can be performed by golf cart owners, some situations require professional assistance:
1. Persistent electrical issues
2. Major mechanical problems
3. Motor rebuilding or replacement
4. Advanced diagnostic testing
5. Warranty-related repairs
Don't hesitate to consult a qualified technician if you're unsure about any aspect of motor testing or repair.
Conclusion
Testing an electric golf cart motor is a crucial skill for maintaining the performance and longevity of your vehicle. By following the steps outlined in this guide, you can identify and address many common motor issues before they become serious problems. Regular testing and maintenance will help ensure that your golf cart remains reliable and efficient for years to come.
Remember to always prioritize safety when working with electrical components, and don't hesitate to seek professional help for complex issues. With proper care and attention, your electric golf cart motor will continue to provide smooth, quiet operation for many rounds of golf.

Related Questions and Answers
1. How often should I test my electric golf cart motor?
It's recommended to perform basic tests, such as visual inspections and resistance checks, every 6 months or 50 hours of operation, whichever comes first. More comprehensive testing should be done annually or if you notice any performance issues.
2. Can I test the motor without removing it from the golf cart?
Many basic tests, such as voltage and amperage measurements, can be performed with the motor still installed. However, for more thorough testing, such as bench testing or detailed inspections, you may need to remove the motor from the cart.
3. What are the signs that my electric golf cart motor needs testing?
Common signs include reduced power or speed, unusual noises during operation, intermittent performance issues, or visible damage to the motor or its components. If you notice any of these symptoms, it's time to perform a motor test.
4. How long does an electric golf cart motor typically last?
With proper maintenance and care, an electric golf cart motor can last 15-20 years or more. However, factors such as usage frequency, environmental conditions, and maintenance practices can significantly affect the motor's lifespan.
5. Can I replace the brushes in my electric golf cart motor myself?
Yes, brush replacement is a relatively simple maintenance task that many golf cart owners can perform themselves. However, it's important to follow the manufacturer's guidelines and use the correct replacement brushes for your specific motor model.


